SSL certificate installation
This network employs technologies which involve the use of locally generated SSL certificates. In order for these technologies to work effectively (in particular, to avoid browser security warnings and ensure compatibility with mobile applications), your computer or mobile device must install and trust the network's SSL root certificate.
This guide will help you install your network's SSL root certificate for Android-based mobile devices.
Step 1
First, click the Download Certificate button below.
Step 2
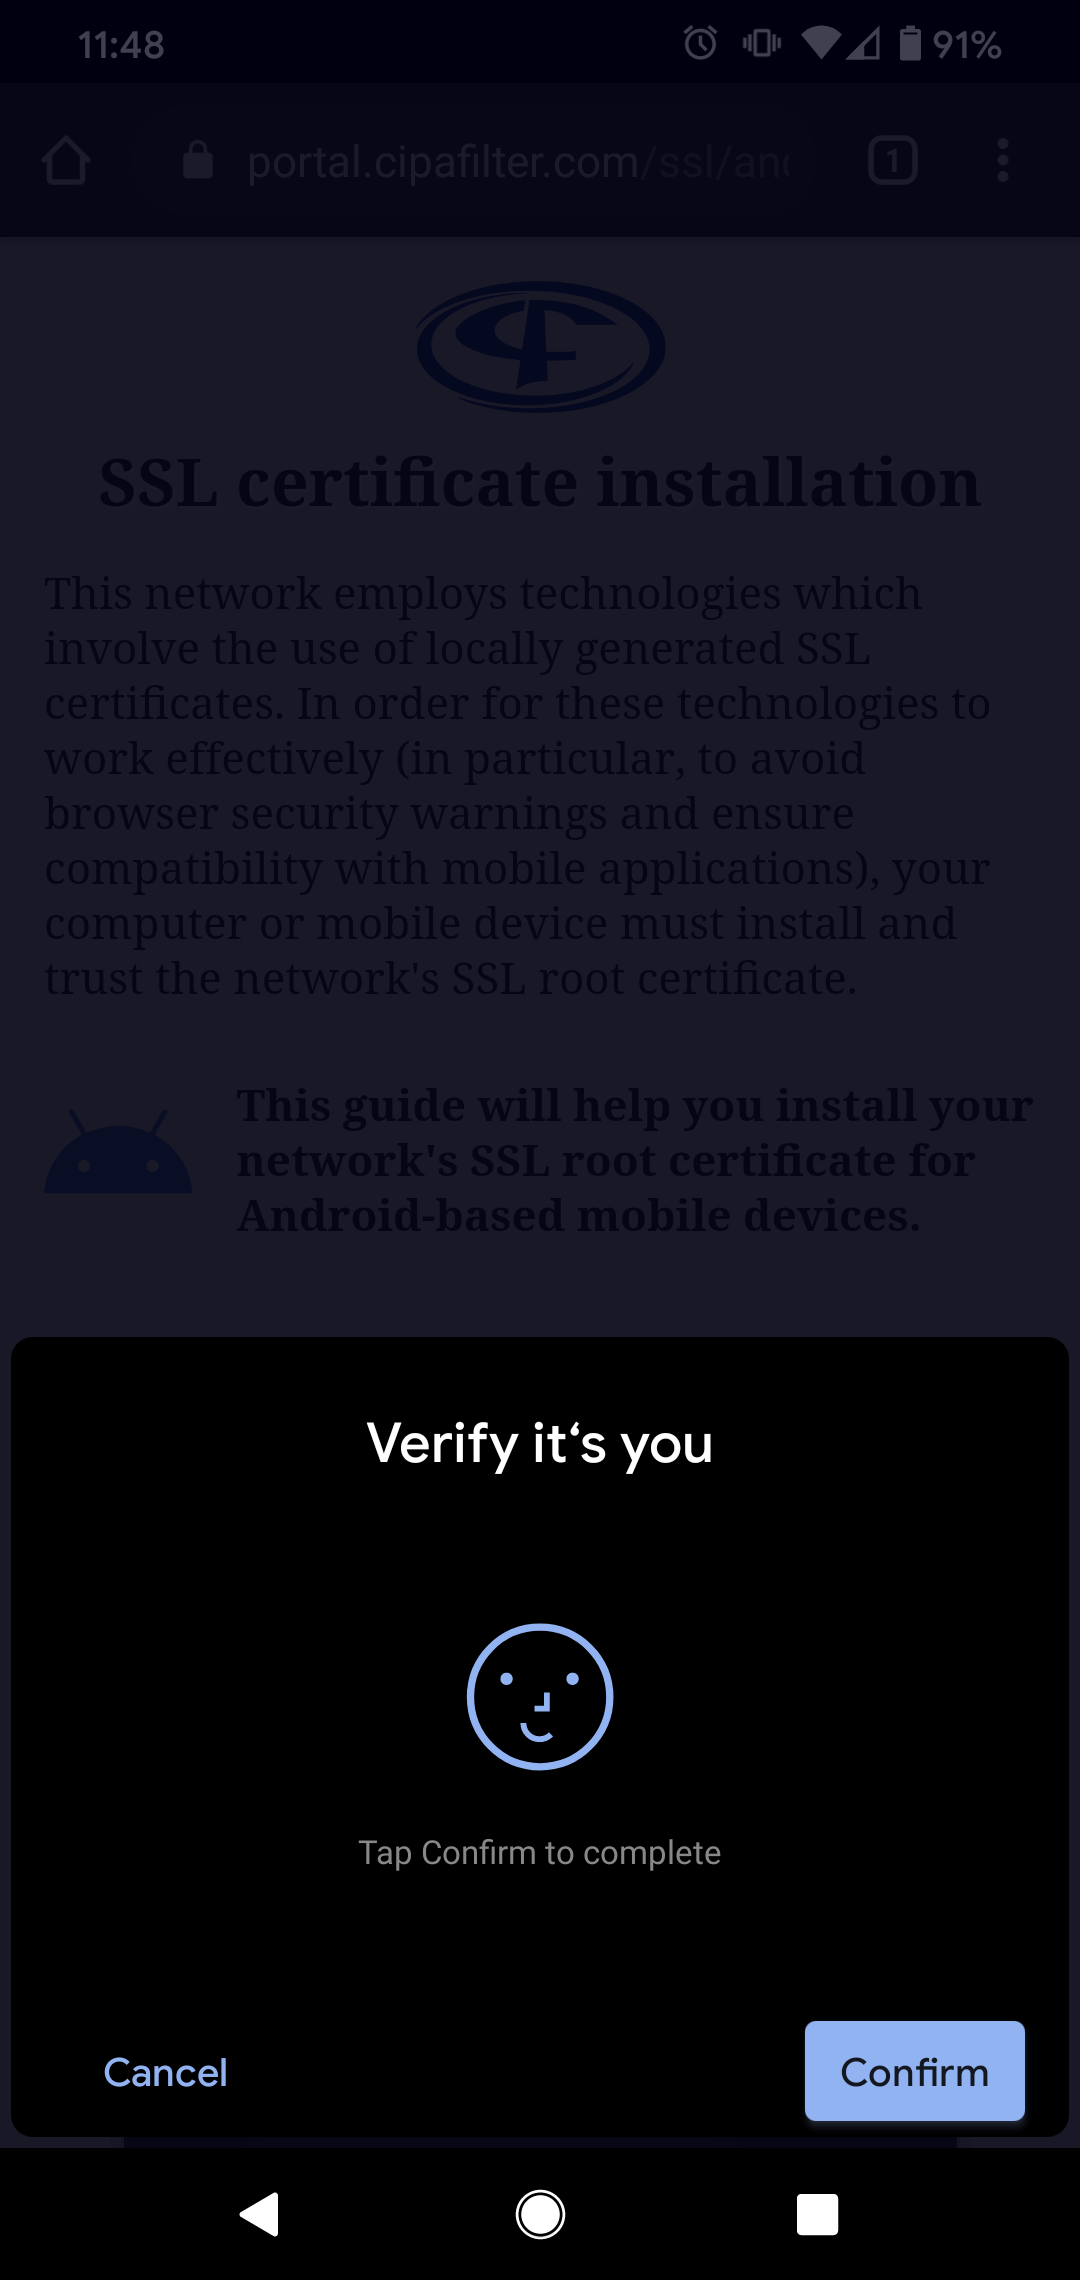
Depending on your device and its configuration, you may be prompted to verify your identity via PIN, password, pattern, finger print, or facial recognition. If you haven't set up a verification method, you may be required to do so.
On some devices, this step and the next one may be switched.
(Note: These images show the steps for Chrome on a Pixel 4 running Android 10; you may not see exactly the same thing if you are using another browser or device, or a different version of Android; however, the general process and wording should be the same.)
Step 3
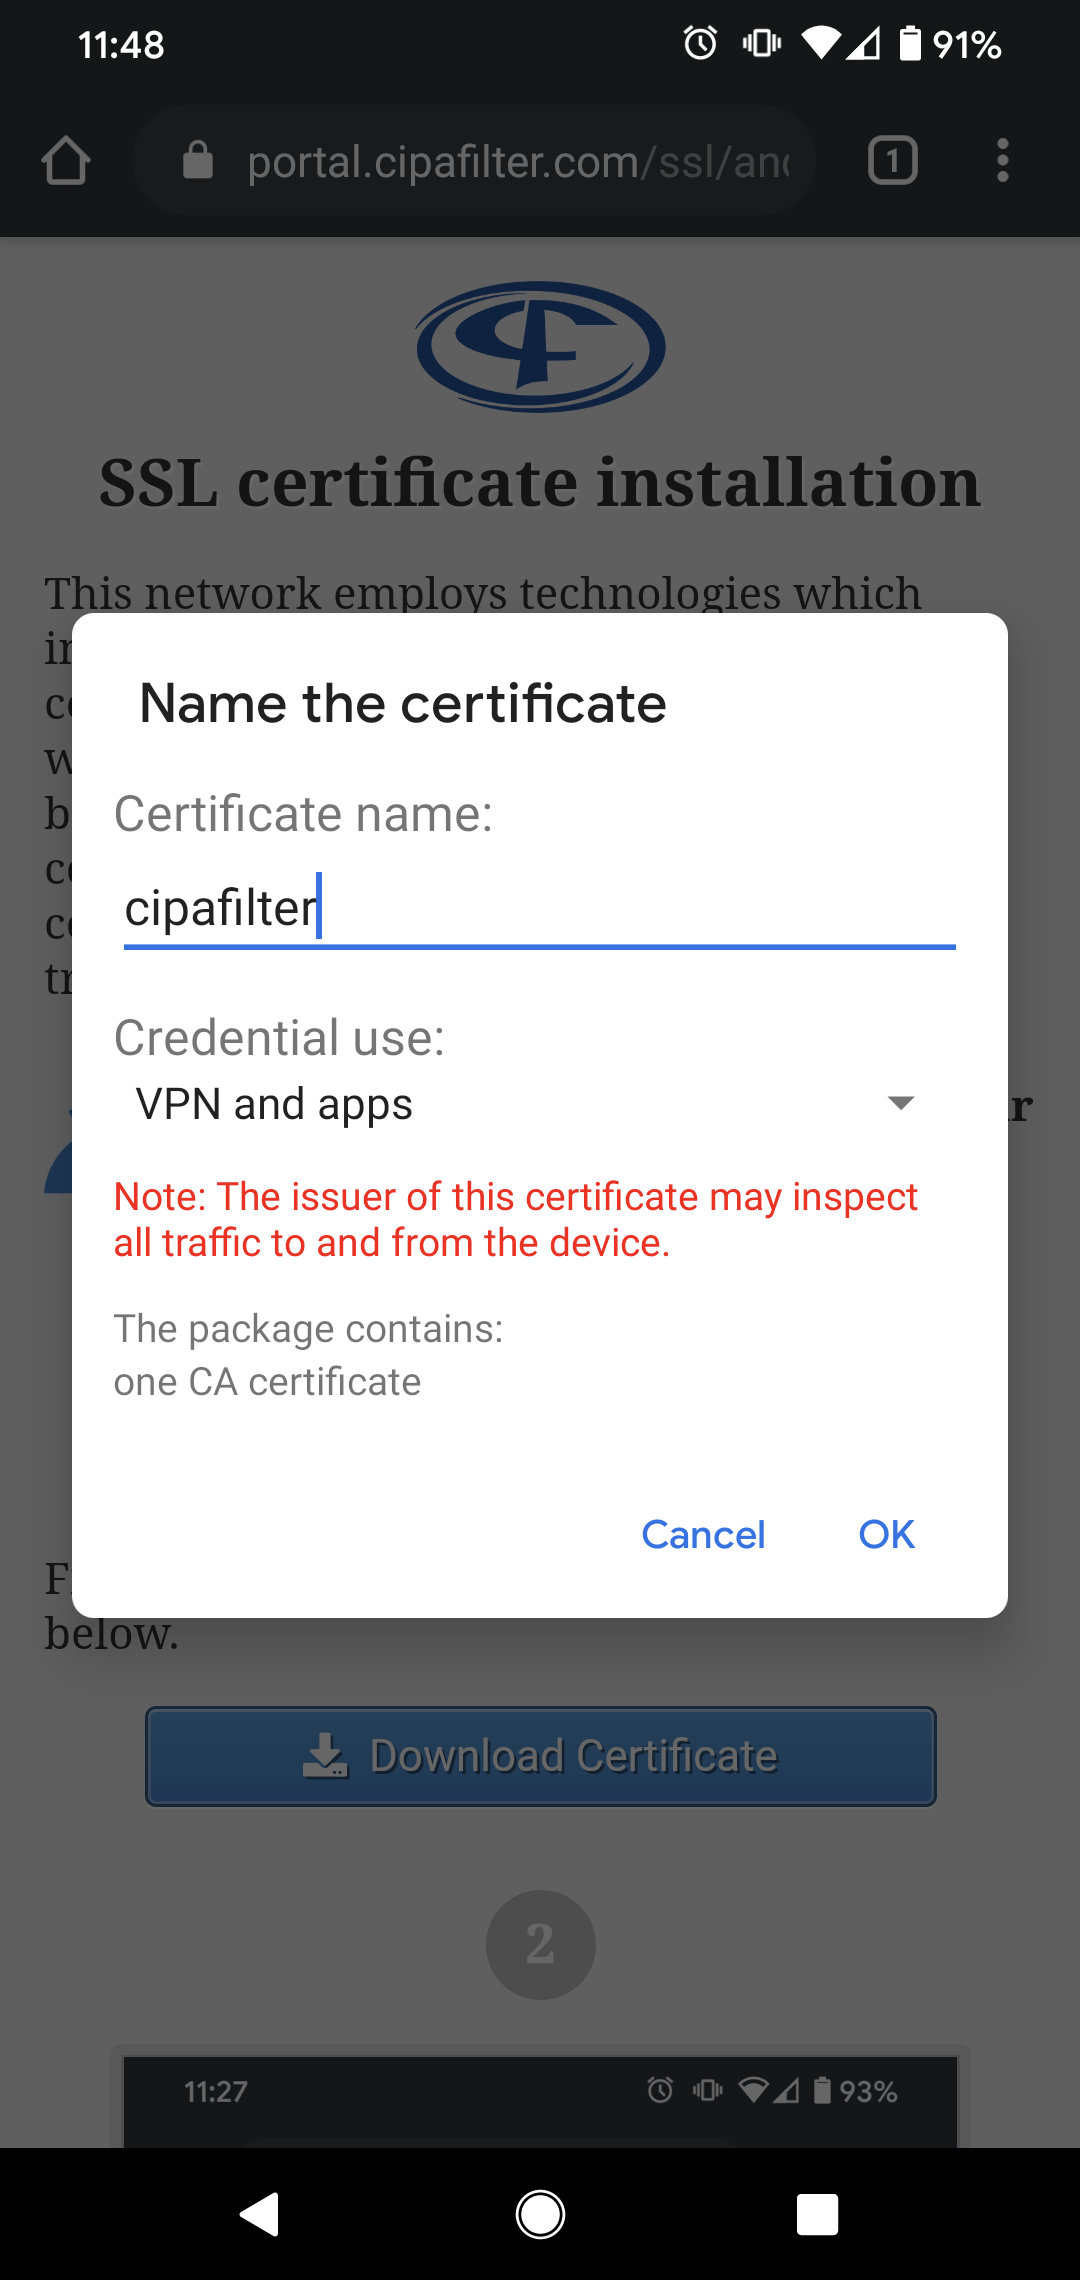
You will be prompted to enter a name for the certificate. Enter whatever you like (e.g. Cipafilter), make sure that Credential use is set to VPN and apps, and then tap OK.
Step 4
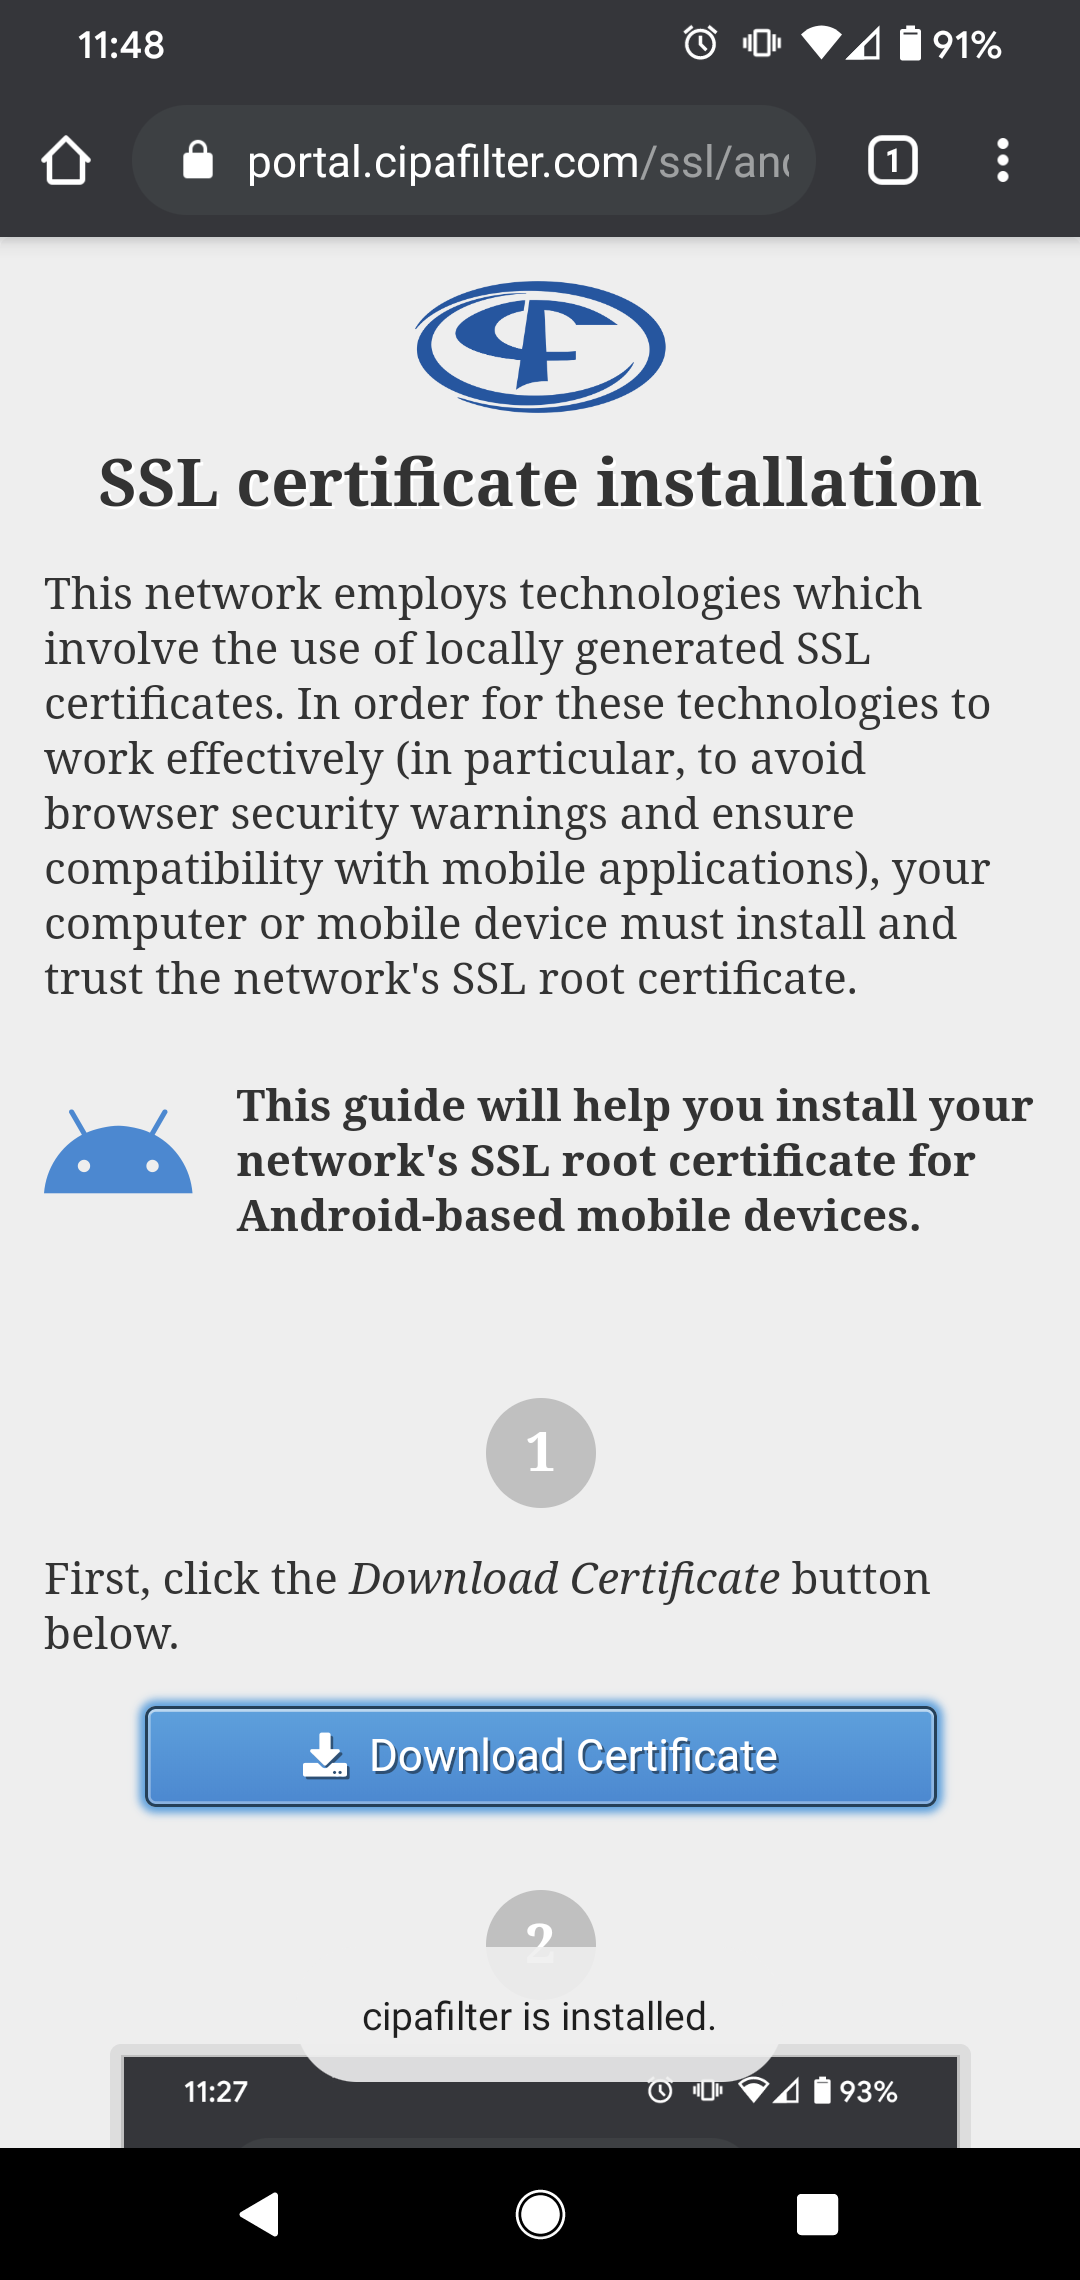
You will see a confirmation that the certificate has been installed.
On some devices, you may also see a warning indicating that a third party (the filter) is capable of monitoring your device's Web traffic. This message is normal and can be dismissed by pressing the back button at the bottom of the screen.
Step 5
You're done! You may continue browsing as usual; in most cases, you will not notice anything different after the certificate is installed.